Laptop Problems
May 3, 2019
My sister has an HP laptop that she bought a few years ago. The exact model is the HP 14-r27n. It wasn’t a powerhouse when she bought it and it certainly isn’t now, but having installed Salix, in place of the Windows 8 that came with it, and which were almost never booted, it still gets the job done.
So, she called me a few days ago and told me that something was wrong with it; certain apps wouldn’t launch. I thought it was weird and my first reaction was to try reinstalling them, in case she had removed them by accident (although I couldn’t tell how or why). So, I instructed her to launch the gslapt package manager from the menu. After she entered her password at the sudo prompt, she told me that nothing happened. So that was weird too. I told her to try again, in case she was entering a wrong password or something, but still nothing. I then instructed her to open a terminal window and launch gslapt from there. I was thinking that maybe, somehow, she had removed some library that gslapt and everything else that wouldn’t launch needed. To that she responded with: “It says ‘Input output error’”.
That was bad. I knew exactly what that was and I immediately asked her if she had any external hard drives. She responded that she did, so I told her to take immediate backups of everything she didn’t want to lose. The spinning hard drive in her laptop, the one that it came with when she bought it, was starting to fail.
Thankfully, she was able to backup everything in her home directory, only the OS partition seemed to be affected for now, but I told her that she should stop working on that laptop, until we could replace the hard drive. She was going to visit in a few days anyway, so downtime wouldn’t be that long.
When she arrived a few days later, I ran a few tests using smartmontools. These proved that I had been right in my guess, the hard drive was starting to fail.
I had an SSD drive that I hadn’t ever used lying around, so I though I could use that to replace the failing hard drive. It would also make the laptop a bit faster.
Unfortunately, the laptop didn’t have an easily accessible bay to get to the hard drive. I needed to tear it apart completely, remove every screw, unplug everything from the motherboard and then be able to access the hard drive. It took me a bit, but I got there.
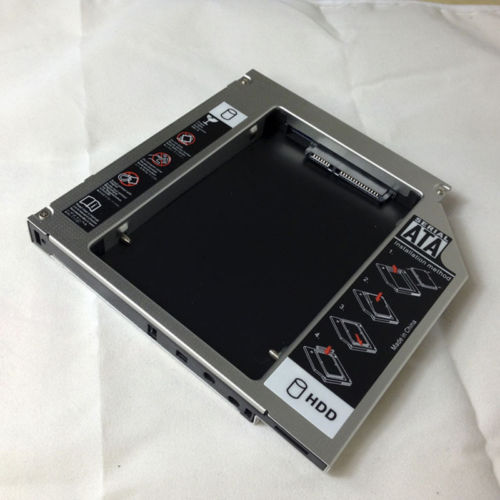
By opening it up, I noticed that the laptop didn’t have an optical drive installed (I already knew that), but there was space for one inside. In place of the optical drive there was a plastic placeholder. But the SATA connectors for an optical drive were there! I then remembered that a few years ago I had ordered a 2nd HD caddy from eBay I intended to use it on an older laptop of mine, in order to install a second hard drive in place of the failing optical drive that it had, but I never got to actually doing it. The caddy looks exactly like this one (not my picture):
So, in addition to the SSD drive, I thought I could also add a second hard drive for storage. And since I was at it, how about upgrading the mere 2GB of RAM that it had?
The SODIMM slot was nowhere to be seen though. It turns out, that it is even more inaccessible than the hard drive. You have to unscrew the entire motherboard from the case, remove the wifi card and USB interfaces, and flip it around, as the slot is located at the bottom side of the motherboard.
Did you notice the singular there? “SODIMM slot”. Turns out there’s only one. So, my initial thought of using a spare 2GB SODIMM module I had lying around to double the available RAM disappeared. Oh well…
I did a quick search online and found out that the laptop supports up to 8GB of RAM, so I went ahead and ordered a module of that size. That would definitely make a huge difference. I also ordered a spinning hard drive to install along side the SSD, so there would be plenty of space for my sister’s files. The SSD was smaller than the original hard drive anyway and couldn’t fit all her files.
A few days later, when my order arrived (it got delayed for a few days because it was around the Easter holidays), I replaced the old hard drive with the new one, also installed the 2nd hard drive with the caddy and replaced the RAM module. I put the laptop back together and surprisingly, everything worked!
I then proceeded to install Salix 14.2, same version as before. Less than five minutes later, the installation was complete and I was booting into the new system.
And that was the first time something went wrong. The system booted, but only to a blank screen, when it should had been showing the GDM login screen. Boot messages were visible before that though. And I quickly found out that by switching virtual terminals with Ctrl-Alt-F1 and back with Ctl-Alt-F7, GDM would show fine and I could log in.
OK then. So I performed all available upgrades, which also brought in Linux kernel 4.4.172, in place of the 4.4.157 kernel it had with the old hard drive. I thought that maybe that would fix the blank screen issue, but it didn’t.
That was weird, because apart from the minor update to the kernel, everything else was exactly as it was with the old hard drive and apparently there weren’t any problem there.
The graphics card, as reported by lspci is this one:
00:02.0 VGA compatible controller: Intel Corporation Atom Processor Z36xxx/Z37xxx Series Graphics & Display (rev 0e) (prog-if 00 [VGA controller])
        Subsystem: Hewlett-Packard Company Atom Processor Z36xxx/Z37xxx Series Graphics & Display
        Flags: bus master, fast devsel, latency 0, IRQ 92
        Memory at 90000000 (32-bit, non-prefetchable) [size=4M]
        Memory at 80000000 (32-bit, prefetchable) [size=256M]
        I/O ports at 3050 [size=8]
        Expansion ROM at <unassigned> [disabled]
        Capabilities: [d0] Power Management version 2
        Capabilities: [90] MSI: Enable+ Count=1/1 Maskable- 64bit-
        Capabilities: [b0] Vendor Specific Information: Len=07 <?>
        Kernel driver in use: i915
        Kernel modules: i915
I thought I’d try upgrading to the latest Xorg intel drivers, so I pulled the code from git, compiled and made a pretty package and installed it in place of the stock one. It didn’t make a difference.
I quickly found out that booting into init 3 and then starting the
graphical environment with startx always worked though.
In the mean time, I started moving my sister’s settings files from the old hard drive to the SSD. A good thing too, because the old hard drive decided to finally die shortly after that. After I copied all settings files, logging into my sister’s account was fine, but logging into my (freshly created) account would show a blank screen!
It turns out that the screen wasn’t completely blank. Rather the screen brightness for my account for some reason was set to the lowest possible setting. Except that it wasn’t, it was set to the highest possible setting, but for some weird reason brightness controls were completely reversed! The brightness buttons on the laptop would work, but the “Increase brightness” button would decrease it and the “Decrease brightness” button would increase it! Except it was even weirded than that, because as the setting would decrease to 10%, at 10% decrements, brightness would increase, but if I further decreased the setting to 0%, the screen would turn blank! And that was true for both mine and my sister’s accounts. And it wasn’t just the hardware buttons, the behaviour was the same for the software slider in MATE-power-manager.
I had never seen anything like that before, and after a quick web search
I came up with nothing useful. I wasn’t sure how to deal with this.
After a while I thought I would look up the available options for the
kernel module that is used for the graphics card, i915, with
modinfo -p i915. So, I got this:
modeset:Use kernel modesetting [KMS] (0=disable, 1=on, -1=force vga console preference [default]) (int)
panel_ignore_lid:Override lid status (0=autodetect, 1=autodetect disabled [default], -1=force lid closed, -2=force lid open) (int)
semaphores:Use semaphores for inter-ring sync (default: -1 (use per-chip defaults)) (int)
enable_rc6:Enable power-saving render C-state 6. Different stages can be selected via bitmask values (0 = disable; 1 = enable rc6; 2 = enable deep rc6; 4 = enable deepest rc6). For example, 3 would enable rc6 and deep rc6, and 7 would enable everything. default: -1 (use per-chip default) (int)
enable_fbc:Enable frame buffer compression for power savings (default: -1 (use per-chip default)) (int)
lvds_channel_mode:Specify LVDS channel mode (0=probe BIOS [default], 1=single-channel, 2=dual-channel) (int)
lvds_use_ssc:Use Spread Spectrum Clock with panels [LVDS/eDP] (default: auto from VBT) (int)
vbt_sdvo_panel_type:Override/Ignore selection of SDVO panel mode in the VBT (-2=ignore, -1=auto [default], index in VBT BIOS table) (int)
reset:Attempt GPU resets (default: true) (bool)
enable_hangcheck:Periodically check GPU activity for detecting hangs. WARNING: Disabling this can cause system wide hangs. (default: true) (bool)
enable_ppgtt:Override PPGTT usage. (-1=auto [default], 0=disabled, 1=aliasing, 2=full) (int)
enable_execlists:Override execlists usage. (-1=auto [default], 0=disabled, 1=enabled) (int)
enable_psr:Enable PSR (default: false) (int)
preliminary_hw_support:Enable preliminary hardware support. (int)
disable_power_well:Disable display power wells when possible (-1=auto [default], 0=power wells always on, 1=power wells disabled when possible) (int)
enable_ips:Enable IPS (default: true) (int)
fastboot:Try to skip unnecessary mode sets at boot time (default: false) (bool)
prefault_disable:Disable page prefaulting for pread/pwrite/reloc (default:false). For developers only. (bool)
load_detect_test:Force-enable the VGA load detect code for testing (default:false). For developers only. (bool)
invert_brightness:Invert backlight brightness (-1 force normal, 0 machine defaults, 1 force inversion), please report PCI device ID, subsystem vendor and subsystem device ID to dri-devel@lists.freedesktop.org, if your machine needs it. It will then be included in an upcoming module version. (int)
disable_display:Disable display (default: false) (bool)
disable_vtd_wa:Disable all VT-d workarounds (default: false) (bool)
enable_cmd_parser:Enable command parsing (1=enabled [default], 0=disabled) (int)
use_mmio_flip:use MMIO flips (-1=never, 0=driver discretion [default], 1=always) (int)
mmio_debug:Enable the MMIO debug code for the first N failures (default: off). This may negatively affect performance. (int)
verbose_state_checks:Enable verbose logs (ie. WARN_ON()) in case of unexpected hw state conditions. (bool)
nuclear_pageflip:Force atomic modeset functionality; asynchronous mode is not yet supported. (default: false). (bool)
edp_vswing:Ignore/Override vswing pre-emph table selection from VBT (0=use value from vbt [default], 1=low power swing(200mV),2=default swing(400mV)) (int)
enable_guc_submission:Enable GuC submission (default:false) (bool)
guc_log_level:GuC firmware logging level (-1:disabled (default), 0-3:enabled) (int)
Can you spot it? Here, I’ll help you out:
invert_brightness:Invert backlight brightness (-1 force normal, 0 machine defaults, 1 force inversion), please report PCI device ID, subsystem vendor and subsystem device ID to dri-devel@lists.freedesktop.org, if your machine needs it. It will then be included in an upcoming module version. (int)Aha! So, that is, in fact, a thing! I then quickly added a file
/etc/modprobe.d/20-intel.conf with the following one line of contents:
options i915 invert_brightness=1Then, I closed the graphical environment with sudo init 3, unloaded
the kernel module with sudo modprobe -r i915 and reloaded it with
sudo modprobe i915. I restarted Xorg and the brightness controls would
work as expected. Nice!
Except that not everything was right. Sometimes, when Xorg would come up, fonts on the system menu would look weird. Sometimes, some letters would be completely missing. Others would show up somehow distorted. Moving the mouse cursor over them would make them appear properly, sometimes.
I remembered that my sister had complained about something like that before. She had even sent me a picture of when it happened, because I couldn’t understand it when she was describing it to me. It would happen very seldomly with the old hard drive, maybe once a month or so. And a restart would always fix it. But with the new one, the problems appeared almost half the times Xorg was started.
I played around with some other i915 kernel module options, but nothing
seemed to fix it. I then decided that I could try changing a few Xorg
options. And after trying out a few, I came to a solution. By adding a
file /etc/X11/xorg.conf.d/20-intel.conf with the following contents,
made everything work with no issues:
Section "Device"
  Identifier "Intel Graphics"
  Driver "intel"
  Option "AccelMethod" "exa"
  Option "MigrationHeuristic" "greedy"
EndSection
At least I think so… I did several reboots and restarted Xorg even more times and saw no problems. Maybe the problem is completely fixed, or it went back to appearing once a month. I prefer the former but I can live with the latter. I’m still not sure why moving to an SSD would make all these problems appear. I gave the laptop to my sister, let’s see if she has anything to report after she uses it for a while. In which case, I’ll take another look when she visits again.